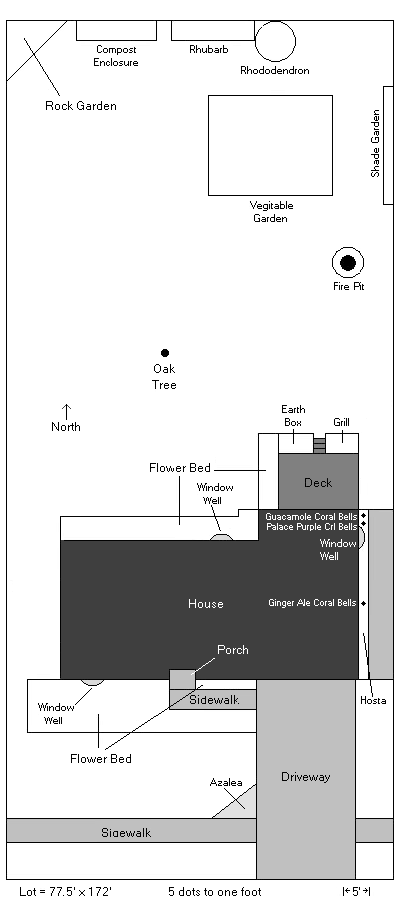
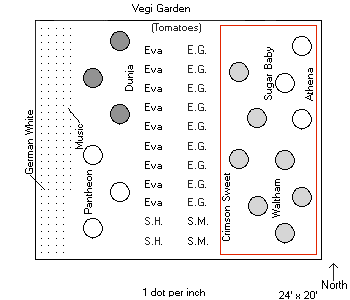
In the veggie garden for 2025, I will be having 3 Lemon Queen Sunflower, 6 Long Island Improved brussel sprouts, 6 zucchini plants (3 Parthenon and 3 Dunja zucchini), 3 Waltham butternut squash, 3 Athena cantaloupe, 2 Crimson Sweet and 2 Sugar baby watermelon, 4 row of garlic, and 26 tomato plants. In the veggie garden there will be two Sweet Million cherry, two Sugary grape, nine Eva Purple Ball, and nine Early Girl tomatoes. The tomatoes are spaced 19" apart and each are in a square tomato cage 48" tall and 18" square with a two 5 foot rebar to keep them from falling over.
Additionally I am growing four of the Eva Purple Ball tomato plants in two Earth Boxes. For more info about the Earthbox growing system, see http://www.earthbox.com/.
I will have 4 three row of garlic, half will be Music garlic and the other half German Extra Hardy Garlic I have the rows of garlic 8" apart and and in the row the garlic are spaced 6" apart.
Each in the fall I enhance 1/3 of my veggie garden. I spread15-20 wheelbarrow loads of compost, then I put 3 to 4 inches of pine bark mulch on it and let it sit thru the winter.
In 2023, a non-resident ground hog devastated my squash, pumpkin, and cantaloupe plants I had. So... starting in 2024 I have had a three prong approach to dis-invite the ground hog. First off, I have taken 36" tall chicken wire, bent the bottom 4" out from the fence and put 4"x4" pressure treated timbers to hold it down.Second I am sprinkling Victor Mole & Gopher Repellent around the perimeter. Lastly I'm putting 4 Defend Solar Ultrasonic Mole & Gopher Repeller spikes in the four corners of the fenced area of the garden.
|
Flower & Vegetable Garden Layout |
|
 |
 |
Below are pictures of the 2 Earthbox on a cart at the old house with
sweet pepper.
|
Two days after transplanting the pepper plants (5/17/05) |
Three weeks later (6/4/05) |
Three weeks later (6/25/05) |
First picking!!! 72 peppers!!! |
|
|
|
|
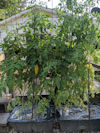
| Tomatoes ready to plant, 5/19/21. See back right tray | Plants doubled in size 527/21 |
Tomatoes 7/27/19, Jet Star on left Box Car Willie on the right |
 |
 |
 |
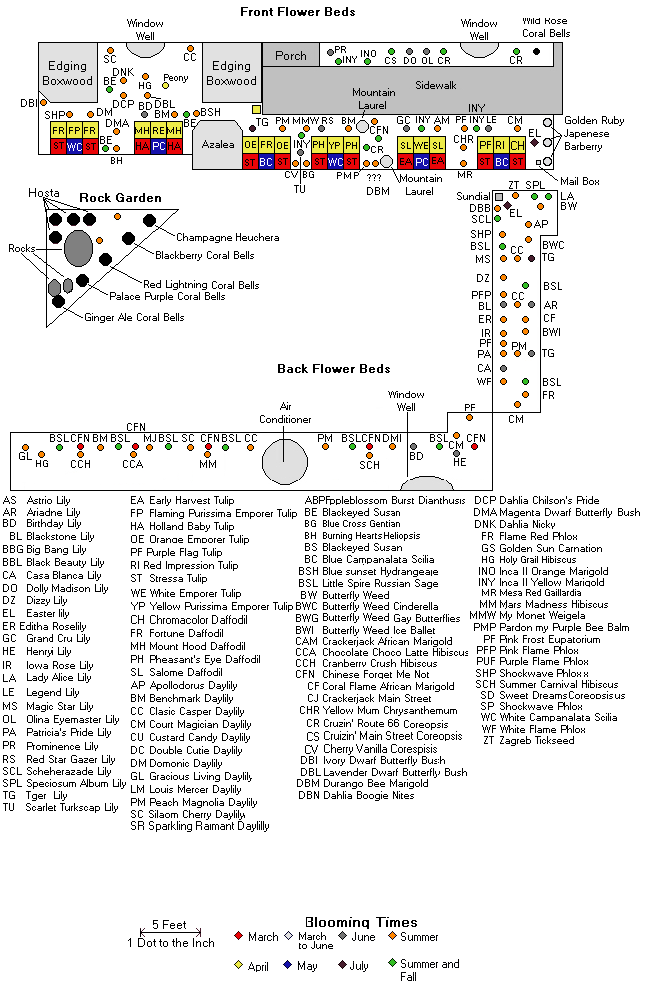
Here is the plan for my flower beds for 2025. The color refers to when the different flowers bloom.

I start my own seedlings under a grow light in my basement. The fourth Saturday of
February I start my green peppers. The fourth Saturday of March
I start my tomatoes. The first Saturday of April I start the cucumber,
cantaloupe. and zucchini. The second Saturday of April I start my squash and
watermelon. Here
are a couple of pictures showing my grow light and seedlings:
(click thumbnail to see larger picture)
In 2003, I found the original plans for my grow light on Cornell
University's "Garden
Based Learning" page. A PDF file containing the plans is located here:
Low Cost Grow Light Frame Plans.
I built the double shop light version of the grow light in 2003. The following year I
made it wider by replacing the four 17" pieces of pipe with four 24" pieces and added a third shop light.
The next year (2005), I added a fourth shop light. I had originally planned to widen the
stand but I noticed that my lights were not fitting thru (between) the legs on
each side. So... what I did was lengthen it by 8".
I took the two 49" pieces off the bottom and cut them so that they were now
8"
longer than the 2 long pieces at the top. Then I replaced the bottom pieces with
two 59" pieces. This modification now allows a shop light to hang between the legs
making room for 4 shop lights. This allows me to have 4 trays side by side and 2
at the end. From 2006 thru 2013 (as seen in pictures above) I used 5
shop light and had 6 seed trays.
In 2014 I added an additional 18" length of PVC to the top and bottom of
the sides plus an adapter and an additional 24" piece on the top allowing me to add a 24" mini fluorescent light at
one end of my growlight allowing me to have 10 1/2 seed trays under my growlight
(see below). That May, when I took the growlight down for the season I added 2
vertical pipes because the weight of the lights causing the frame to sag as can
be seen in the May 5th. picture.

Seed tray layout under the growlight